Have you ever wanted to make iOS or Mac apps? Or just wanted to program on a Mac? If so, you’ll need to get familiar with Xcode. But what is Xcode, exactly?
Xcode is Apple’s complete suite of coding tools for developing Mac OS X and iOS software. It has everything you could need for developing software on the Mac, such as a feature-full IDE (Integrated Development Environment), interface builder for making sleek interfaces for apps, and support for many programing languages including C++, Objective-C, and Java.
In this guide I will teach you some of the basics of using Xcode, including where and how to get it, and even share a few tips and tricks to help you get started.
Where to Get it
First things first, before you can start using Xcode you need to download it.
If you have the latest version of Mac OS X (10.7 “Lion”) then you can get Xcode completely free of charge in the Mac app store. However, if you don’t have the latest version of Mac OS X you’ll need to sign up to be a Apple Developer, which costs $99 a year, but afterwards you can freely download Xcode as much as you want.
A Quick Rundown
Once you have Xcode you can begin familiarizing yourself with some of its features and its interface.
The first thing you may notice upon starting Xcode for the first time is the Welcome Screen. On the right side of the Welcome Screen is a list of all the recent projects you’ve been working on -which will be empty for now- and on the left are 4 handy links.
The 4 links are; “Create a new Xcode project”, “Connect to a repository”, “Learn about using Xcode”, and “Go to Apple’s developer portal”.
The first link is pretty self-explanatory, clicking it will start up the new project wizard, allowing you to start creating apps.
The second link, “Connect to a repository”, is a bit advanced for now, but basically it lets you connect to a Git or Subversion repository to help manage your projects.
The third link called “Learn about using Xcode” is an incredibly useful source of information about Xcode. I highly recommend that you look through and read some of the guides there once you’re done reading this article.
The final link, “Go to Apple’s developer portal”, is a link that will open up the Apple developer site in your main browser. Here you can explore some of the dev centers that are available.
As you can see, the Welcome Screen can be very helpful, especially when you’re first starting out with Xcode. This is why I recommend leaving on the option for it to show the Welcome Screen when you start up Xcode.
Creating Your First Program
Now that you’re familiar with the Welcome Screen and its handy links, you probably want to go ahead and start your first project and begin exploring some of Xcode’s features.
Since this will be your first program, we’ll start with a simple Mac command line program. To do this, click on the “Create a new Xcode project” link from the welcome screen, this should bring up a new menu with multiple templates to choose from. You’ll want to click “Application” underneath “Mac OS X”, then select the option called “Command Line Tool” and then click “Next”.
Now name the project whatever you want (‘My first program’ for example), and then you’ll choose where on your Mac you want to save the project.
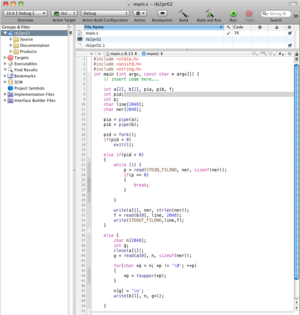
Once you’ve created the project you should see a file called main.m , this is the file that has all the code to run the program. As you can see, it already has a few lines of code already.
You may now press the “Run” button on the top right of the window to run the template program. After running it, you should see an output window in the bottom right corner that says “Hello, World!”.
Congratulations, you’ve just created and ran your first program in Xcode! If you wish, you can explore some of the other templates and get a feel for all of the options and features of Xcode.
Keyboard Shortcuts
They may not seem like much at first, but keyboard shortcuts can really improve your productivity when coding with Xcode. It’s best to start getting used to them now so that in the future, when they’ll really make a difference, they will already feel like second nature.
Here’s a list of some of the more useful keyboard shortcuts for Xcode:
Shift-Command-N – This shortcut will immediately create a new project for you
Command-O – This lets you open a pre-existing project
Shift-Command-O – Similar to the above shortcut, this one lets you open a file quickly by typing in its name in the search box
Command-S – Use this shortcut to quickly save a project or file
Option-Command-F – This shortcut allows you to find and replace any word in your currently open file
Command-R – This is the shortcut to Run your program
Command-B – This shortcut builds your program
Conclusion
After reading this you should now have a basic grasp of Xcode and its capabilities. If you wish to know more about Xcode, I highly recommend you explore some of its features for yourself and also read some of Apple’s guides and documentation, which can be accessed by clicking the “Learn about using Xcode” link on Xcode’s welcome screen.


")