The truth about home improvement is that even the smallest DIY project can gobble up huge chunks of your time, energy, and enthusiasm. In fact, if you’re not careful, it can turn into a comical nightmare of mistakes and miscalculations. I learned this firsthand when I tried to install a new curtain rod in my living room. To spare you the pain of what I went through, I’ve detailed my efforts below:
Measure your window
I started by measuring my window area to figure out where the brackets should go. It was as easy as using the length of my curtains for the height, and the window itself for the width, right? Wrong!
Much later, I realized that I’d forgotten to factor in my curtain ring clips, which add another inch or so to the final height. I also didn’t know that curtains look much better with plenty of breathing room. Always extend and mount your curtain rod at least a few inches past the window on either side.
Buy the perfect curtain rod
After checking a few stores, I bought what I thought was the perfect curtain rod. It was expensive, sure, but finding the right one for my living room window was worth the high price, right? Wrong!
After a few days, I returned my pricey purchase. It had an adjustable width, which creates a tiny bump where the two sections of the rod meet – and no curtain on Earth will slide past that bump without a fight. If you like to open and close your curtains, don’t buy an adjustable-width rod.
Or try making a curtain rod
Determined to make a better, cheaper curtain rod, I went to the hardware store. My plan was to browse the lumber section and pick out the perfect wooden pole. Sounds easy, right? Wrong!
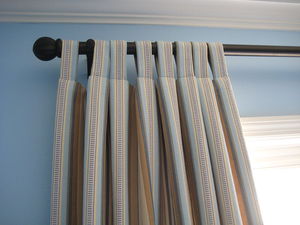
After striking out in the lumber section, I wandered all over the store until I found a solution in the plumbing aisle: EMT pipe. It’s solid, lightweight and comes in varying widths. I chose one, had it cut to size, and then spray painted it at home. Remember, the perfect curtain rod may be one you make.
Attach the finials
After my newly painted curtain rod was dry, I used a hot glue gun to attach the decorative finials, or caps, to each end. Then all I had to do was add the curtains and hang the rod, right? Wrong!
I didn’t realize that once the finials were attached, the curtains themselves couldn’t be added because they wouldn’t fit over the larger caps. And, because I used hot glue, removing them wasn’t easy. Avoid this extra labor by adding your curtains to the rod before attaching the finials.
As you can see, installing a new curtain rod isn’t always the quick, easy DIY project that many home improvement experts make it out to be. By sharing my story above, I hope you can learn from my mistakes so that your attempt is a success.