There is something about rigging a boat that so many people miss. As a captain I have been on and run literally hundred of boats. Very few have been rigged out in a way that really makes sense. Most have equipment that doesn’t work and is hard as heck to maintain. It is really not that hard to install electronics and accessories that can stand the test of time in a marine environment.
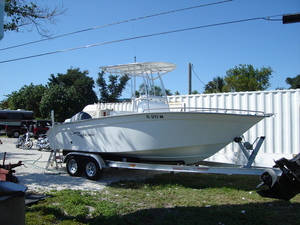
One of the simplest things to consider in boating is that less is more. Before installing every possible toy that you can on a boat think about what you really need. Keep it simple and the toys will last longer. Lately I have been hired to help rig out a few new boats for a local boat rental company named Captain Pips. The call came out of the blue. I had not idea why they wanted me to help rig the boats until I got there. The reason was simple. They wanted them rigged right.
Just a little extra attention to detail is all that is required. Knowing that saltwater and electricity don’t play well together when rigging electronics you rig so that you can repair. Now matter how good a rigger you are things will corrode so make the install easy to follow and easy to fix. This was an overlooked concept by their previous assistant rigger. I a rental boat fleet this is extremely important! Consistency saves big bucks by reducing down time. All the new boats have the same electronics rigged the same way making repairs a snap.
To reduce exposure to the salt water environment, the electronics, GPS/Sounder and VHF radio, are flush mounted in the console. This takes a little more time and attention to detail. When finished though it is well worth the effort. Most electronics have flush or dash mounting hardware and templates included. Tolerances in cutting out the dash are fairly tight in most cases so the installer needs to think ahead. You know measure twice and cut once. So lay the templates out and before you start cutting make a dry run with the cutting tool. If you try to get too tricky you may find that your cutting tool may get too close to something. In the best case you will have to resort to manual cutting and/or grinding. In the worst case you may loss control of the power tool and trash the dash. Also before cutting check the back side of the dash to make sure you be cutting through anything other than what you want to cut through.
The layout on the boats was simple, a good thing, and the factory wiring well placed. So after double checking the GPS/Sounder template location the hole was cut in the dash with a Dremmel tool and spiral cutting bit. These spiral cutting bits are perfect for the job. Roto-Zip cutters will work fine, but the Dremmel tool has a smaller diameter making it easier to use in tight quarters. You just drill a starter hole in the template and cut out the line. The Gramin 498 GPS/Sounder that we were installing is a tight fit so the cut needs to be exact.
After cutting the GPS hole, the radio is laid out for a clean function placement. Radio can interfere with compasses so it is located as far from the compass as possible. Again the template is taped in place and everything double checked before the cutting starts.
Both the GPS and radio have external antenna that are to be mounted on the factory Tee Top. The top is fabric covered so duct tape in placed over the mounting brackets before drilling the mounting holes. Without the duct tape there is a good chance you can rip a $300 dollars canvass to shreds. The mounting brackets are positioned and the hardware bolt hole locations marked. To save time, all the holes required for mounting the hardware and routing the coaxial cables through the top piping located and marked.
After verifying the locations, the drilling points are started with a center punch to make sure the drill bit does not wander. Then all of the points are drilled with a ¼” drill bit. It is not a bad idea to use a smaller 1/8″ bit to drill a pilot hole before making the final drill size. With a good sharp ¼” bit you can save time if you have so experience. With the ¼” holes drilled we enlarged the cable path holes with a larger drill bit to 5/8 inches. This allows the use of a nifty little trick. By running the coax inside of plastic fuel hose, the hose is inserted into each of the 5/8″ holes drill in the top aluminum. This make a sharp looking install and the hose prevents chaffing of the coaxial cable. Note: the GPS has its connector installed. You have to split the fuel hose length wise to install since the connector will not pass through the hose.
Once the antenna brackets are mounted with the proper sized stainless bolts and nylon locking nuts, there is one thing left to do before climbing under the console to finish the wiring. That is to mount the sounder transducer. This is we I started beaming with a little pride. The transducer is a shoot through the hull mount. I first installed a transducer like this in ’84. Everyone thought I was nuts because that was just not the way it was supposed to be done. It only took the rest of the world twenty years to catch up to me.
The Garmin transducer is glued to the hull inside near the center of the keel line with the provided epoxy adhesive. The placement has to be fairly level and the area cleaned completely with acetone before gluing the unit down. If you want to try the same method of installation, a standard transom mount transducer can be mounted with epoxy or 3M 5200 calking. It will work fine as long as there are no air bubbles between the transducer and the hull. Foam cored hulls were not meant for this type of install. It has to be a solid hull.
With everything mounted it is time for the final fishing and wiring. The antenna cables are fished or pulled through the tee top piping and the transducer cable fished console rigging tube. The VHF antenna has a connector that has to be installed and soldered. The instructions are very clear for installing this connector. There is one little trick you might like to know. Instead of heating and then applying the solder, I place a piece of solder in the connection and then heat. This way the least amount of heat required can be used preventing damage to the coaxial cable insulation. Both the signal wire and the shield wire are soldered in this method.
When I got in the console to finish the installation I had another chance to beam a little. The fuse block from the factory is an automotive style using the stake in fuses. The fuse slots are all pack with non-conductive grease to prevent corrosion. Mark, the mechanic I was helping, and I started using this method in 2001. This time it only took five years for the pack to catch up. The power wires for both the GPS and VHF have inline fuse holders which were removed. This way properly sized fuses installed in the fuse block can be easily located. No more digging around in the wiring harness to find inline fuses that a subject to corrosion.
The 12 volt power and ground for each component need to have spade connectors installed to attach to the fuse block and ground block. The connectors used have preinstalled heat shrink tubing. This is the one point where my rigging method varies from Captain Pips’. I prefer to crimp and solder my connectors then heat shrink. The crimp and shrink style are more likely to corrode or develop loose connections. Crimped and soldered will last much longer without problems.
With all the wiring and the back side mounting hardware installed it is time to make it pretty. Excess coaxial cable is neatly bundled and strapped in place with Panduit straps. The power and data cables for the electronics are neatly routed and strapped to the wiring harness. In both cases enough slack at the cable ends is allowed to prevent vibration from damaging the connectors. Not too much slack though or the swinging cable can cause problems.
After a quick clean up it was beer thirty and time to admire a job well done. Whether you want to install your own electronics or pay a rigger, the process described is a great way to not have problems. It also has much cleaner look.