When the outside temperature dips, it’s a good idea to check your thermostat to make sure it’s in working order. If it isn’t, you must replace it before winter is in full force. Most property owners become anxious when they need to figure out how to replace a home thermostat. Doing repair work around electricity may make anybody a bit nervous if they don’t have the knowledge or skill to cautiously get the task done. Luckily, replacing your home thermostat is a reasonably simple job to do.
Step 1 – Preparation
Be sure that the new thermostat you’re installing to replace the older one is compatible to the voltage of your home’s circuitry.
Step 2 – Turn Off the Electrical Power
Always switch off the electrical power to the thermostat at the power control panel or breaker box. When you have located the corresponding circuit breaker and turned it off, put a strip of masking tape across the switch so that nobody will flip it back on during the installation process of your new thermostat.
Step 3 – Remove the Old Thermostat
Remove your old thermostat by snapping off the cover or unscrewing it if happens to be attached by screws. Pull the whole thing away from its position on the wall and slip it carefully off the mounting base. Take care not to damage any electrical wires.
Step 4 – Disconnect Electrical Wiring
Remove the electrical wiring from the back part of the old thermostat. Be sure not to let the wires fall down into the wall. Wrap these wires around a pencil to prevent them from dropping through the hole in the wall. If the electrical wires are not color-coded to your new thermostat, mark each wire, taking note of which terminal they were attached to before you removed them. Remove the mounting base with a screwdriver.
Position the new mounting base or mounting plate for your new thermostat up against the wall in the same place where the old one was. Next, pull the wires out from the wall through the holes in the back of your new mounting base. Secure the base onto the wall with your hand. Get it square to the wall before tightening up the mounting screws. Align the unit and check for leveling before you fully tighten the screws.
Step 6 – Carefully Connect Electrical Wires
While connecting the wires, be sure that the green-colored wire connects to the terminal that is marked “G” or is the same color. This controls the fan blower. The white-colored wire goes to the terminal marked “W” to run the heater. The “Y” terminal is for the yellow-colored wire that connects to your air conditioner. Make certain that if these wires are not color-coded when you remove the old unit that you mark each wire correctly before connecting them to your new thermostat. Don’t cross electrical wires. If you’re in doubt at this point, contact a professional electrician.
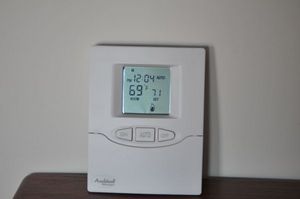
Step 7 – Place New Thermostat on Mounting Base
Put the new unit on the mounting base by sliding it carefully into place. Switch your electrical power back on and determine whether or not your new thermostat is on and working properly. Follow the thermostat manufacturer’s instructions to set up the LED display panel that permits you to access temperature control features.