There are basically two types of extension cords- general purpose and heavy duty. General purpose cords are handy for when you need to temporarily plug in an electrical device such as a trouble light, lamp or a radio, and their cords are too short to reach an outlet. Heavy duty extension cords are designed to safely handle larger electrical loads, such as what a computer, refrigerator or microwave would use. After much use, or, if they are damaged, the the ends of the
cord can become unusable. Instead of tossing the whole cord out, learn how to replace a heavy duty extension cord plug instead! It doesn’t take much time, and you’ll save money!
Caution: Before you service anything electrical, unplug it from the electrical source.
The specific end I’m replacing is technically called a “grounding cord outlet.” It’s the female, or reciprocal, end of the cord. Before you replace a heavy duty extension cord plug, inspect the entire cord and make sure there’s no other damage. Otherwise, you’ll just be wasting your time.
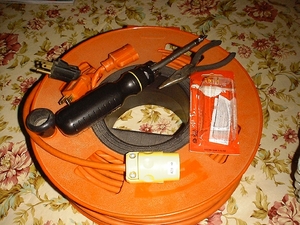
The only tools you need for this task are a screwdriver and a pair of wire cutters.
Step #1 Remove the Damaged Plug
Use your wire cutters and snip off the damaged plug on the heavy duty extension cord.
Step #2 Prepare the New Extension Cord Plug
Loosen the screws in the front of the replacement plug; pull the outlet apart. You may also need to loosen the screws on the clamp on the other end of the plug so you can fit the wires of the cord through. Slide the end of the extension cord through the clamps and on through the back section. Let the back section slide down so it’s out of your way.
Step #3 Prepare the Electrical Wires
Use your wire cutters to remove the protective outer covering about an inch from the end of the heavy duty extension cord. You’ll now see three colored wires. They’ll be wound together. Remove the material, and separate and straighten the black, green and white wires. Carefully remove the outer coating on each wire about a half inch from the end so the bare wires are exposed. Make sure the wires are separated enough so they can reach the three screws in the main housing of the cord plug.
Step #4 Attach the Electrical Wires
To continue to replace a heavy duty extension cord plug, take a close look at the screws in the main housing. One screw will be green, one will be gold, and one will be silver. Twist the strands of each wire together before you attach them to their corresponding wire clamps. Then, place the green wire on the green wire clamp; tighten the screw. The black wire goes on the gold terminal; tighten the screw. And, the white wire goes on the silver wire clamp; tighten the screw.
Check to make sure the bare ends of the wires are firmly inside each wire clamp. Each wire should only touch the clamp and nothing else. Do a final check and inspect the covering of the wires to make sure it’s not damaged.
Step #5 Reassemble the New Cord Plug
Line up the keys on the front and back pieces of the plug, then slide the unit back together. Tighten the two screws that hold the unit together. Then, tighten the screws on the clamp firmly, but not too tightly. The clamp keeps the cord from coming out of the heavy extension cord plug.
Now that you have replaced the plug, your cord is ready for use again!