Sometimes, especially while moving furniture, baseboard molding can get damaged. I know this first hand. Thankfully, there is an easy way to replace a damaged piece of baseboard molding. In my opinion, the worst part of the whole job is the cost of purchasing the baseboard molding. Depending on what type of baseboard you want to buy and where you purchase it, a single piece could cost you $30 and that’s not counting the additional cost of shoe molding. Once you get past the cost, replacing the baseboard is the easy part. Here’s how to do it:
Baseboard Replacement Supplies
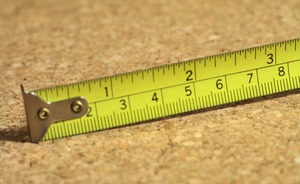
In order to complete this project you will need two small pry bars, two small blocks of wood, a metal tape measure, a metal compass ($2), a crosscut saw ($85) and a miter box ($21). You’ll also need a claw hammer, a box of finishing nails, baseboard molding and shoe molding.
Removing the Damaged Baseboard
Start by placing a piece of scrap wood between the pry bar and the molding. In my experience, doing so will help to protect the molding and the wall from damage. The last time I forgot to use the wood blocks as a buffer, I ended up having to repair a hole in the drywall. Use the pry bar to remove the shoe molding. Once the shoe molding has been removed, you can get to work on removing the baseboard. Place a piece of wood between the floor and the first pry bar as well as a piece of wood between the wall and a second pry bar. Again, this will help to keep the pry bars from digging into the floor and the wall during use. Using both pry bars simultaneously, carefully pull the baseboard away from the wall.
Preparing the Replacement Baseboard
Once the damaged baseboard has been removed, measure how much replacement baseboard is needed. Then transfer those measurements to your new piece of baseboard. Proceed by placing the baseboard inside your miter box and cut it to the size needed with your crosscut saw. If you are working in a room where the floor is uneven, you may need to use the point of a metal compass to inscribe the bottom edge of the molding in order to get the right fit. To inscribe the replacement baseboard, place it in position. Next, place the metal compass flat on the floor in front of the baseboard with the pointed, metal end of the compass flush against the wood. While keeping the compass flush against the floor, slide it along and allow the metal point to etch a cut line for you into the baseboard. After the cut line has been demarcated, remove the baseboard and make the appropriate cuts. Personally, I find using a jig saw for this particular task easier than using a crosscut saw. You may not feel the same way.
Installing the Replacement Baseboard
Take your cut-to-size baseboard and position it in place. Using your hammer and finishing nails, attach the baseboard to the wall. If shoe molding is desired, cut a replacement piece and attach it to the baseboard. That is all there is to it. I should mention, however, that if you plan on staining or painting your baseboard, you may want to do it while the baseboard is still unattached from the wall. It tends to make the task a bit easier because you don’t have to worry about getting excess paint or stain on the wall.
Killeen Gonzalez has a history of completing home improvement projects with her family.
More from this contributor:
How to Make a Combination Portable Chair and Storage Unit for Camping Trips
How to Repair Asphalt Shingled Roofs
How to Repair a Vinyl Lawn Chair
How to Repair a Venetian Blind