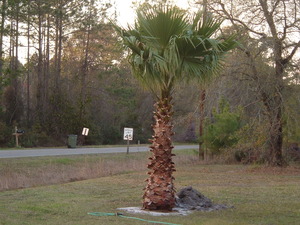
Shortly after my family moved to South Georgia, we decided to buy a few palm trees for the lawn. One of the first palm trees that we purchased was an 8 foot tall Washingtonia Robusta palm (Mexican Palm). We bought it through one of our local home improvement stores and it cost us roughly $200. Instead of having it delivered and professionally planted, we decided to do it all ourselves. Here’s how we got the job done:
Transporting the Palm Tree
The fine folks at the home improvement store helped us by loading the palm tree onto our heavy duty pick-up truck. We made sure that the palm tree was secured to the bed of our truck with bungee cords and heavy duty rope. We also attached a red hazard flag to the rear of the truck before attempting to drive home.
Preparing the Planting Area
Once we got home, we drove the pick-up truck to the spot in the lawn where we planned to plant the palm tree. Before taking the palm tree off of the truck, we measured the root ball and gave it a good soaking with the garden hose. Then we took out our shovels and dug a hole that was roughly three times as wide as the palm tree’s root ball. Once we had the right width, we dug down deep enough to cover the entire root ball with soil.
Afterward, we filled the freshly dug hole with water and let it seep into the ground. Then we added a palm fertilizer and peat moss mixture into the hole along with some more water. The palm fertilizer and peat moss was necessary due to the pH level of our soil. If you don’t know the pH level of your property’s soil, you can generally buy a soil test kit from a home improvement store for $12. The results of the kit will let you know what, if anything, needs to be added to your property’s soil in order for the palm tree to grow properly. A bag of the palm fertilizer will typically cost you $9.
Planting the Palm Tree
With that task complete, we removed the palm tree from the truck and placed it into the center of the hole. Then we flooded the hole with water and let it seep into the ground before filling in the area around the palm tree’s root ball with soil. Once that was done, we placed additional soil around the base of the palm tree and made an irrigation well. At that point, we filled the irrigation well with water. While the water from the irrigation hole soaked in, we created a brace around the palm tree. We felt that the brace was needed in order to protect the palm tree from strong winds until the roots had a chance to take hold. During the first few weeks, we made it a point to water the palm tree often. After a few months, we went ahead and removed the brace.
Killeen Gonzalez has a history of completing home improvement projects with her family.
More from this contributor:
5 Actions Every Caregiver Needs to Take Before Hurricane Season Starts
How to Paint a Barbecue Grill: Personal Experience
Best 5 Campgrounds in the Fort Myers, Florida, Area
Georgia’s Top 5 State Parks for Hiking

