Everyone wants to get his or her tomatoes in the ground as early as possible. Unfortunately, Mother Nature isn’t always cooperative. With your own home made wall-o-water protectors, you can set tomato plants out weeks before the last frost.
I’ve tired commercial products for this and didn’t like them for a variety of reasons. I never quite got the hang of filling them efficiently. One side always sagged or bulged dragging the wall-o-water to the ground in a heap, or toppled in onto my tomato plants. Once I managed to get them filled I found I had to peek in the top to check my tomato plants and I really couldn’t do this very well.
The tomato plant grew well and obviously loved the additional heat the warm water supplied; however when it was time to remove the wall-o-water I faced yet another hassle. Emptying the pockets of water and removing the well-of-water was inconvenient and it suddenly exposed my tomato plants to the harsh outside environment without the benefit of being hardened off. This resulted in some plant damage from the wind and sun and my tomato plants suddenly halted their growth while they adjusted to the climate change.
After a little thought, I discovered a way to reap the benefits of the warm protective ring of water around my plants without the hassles of the wall-o-water protectors.
Here’s how I created the same effect with recycled two-liter soda bottles. Wash and remove the labels from 7 two-liter bottles and fill with water.
Location
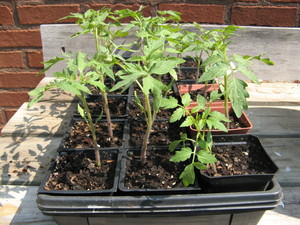
Choose the location of your tomato plants. As with any tomato plants it is important to choose a sunny location with rich soil and proper drainage.
Warm the Soil
To warm the soil, I set my bottles in the garden for a day or two prior to setting out the tomato plants. Because you can easily change the position of the bottles, this is easy to do. You could also warm the soil by covering the area with black plastic for a few days.
Transplant the Tomato Plants
Once the soil has warmed, move the bottles aside and transplant you tomato plant into the soil. Dig a hole 8 inches in diameter and six inches deep. Add one quart of water to the hole. Set the root ball at one end of the hole and gently lay the tomato plant on its side bending the stem up when you reach the portion with leaves. Fill the hole with soil and pack firmly. About four inches of the tomato plant should be above ground. Don’t worry; it will regain its original height in no time. Roots will form along the stem and assure that your tomato plants will have strong root system.
Set Up
Arrange the two-liter bottles of water to form a circle around each individual plant. The bottles should be touching with no gaps in between. Make sure to leave enough room between the tomato plant and the bottles for the plant to grow.
Adjust for Growth
Once your tomatoes begin to grow, if they need more room,you can simply add another bottle of water and make the circle a little larger to provide more room for growth.
Hardening Off
When the tomatoes reach the top of the bottles, it is time to begin hardening off your tomato plants. Remove one bottle and evenly space the others around the tomato leaving small gaps between bottles to allow the plant to get accustomed to the outside environment. After a few days, remove another bottle and leave wider gaps between bottles.
Gradually removing bottles until the tomato plant is accustomed to the outside conditions prevents shock to the tomato plant and prevents sudden stunted growth.
With these home made protectors for your tomato plants, you can get a jump start on spring by setting your plants out before the last spring frost. The warmth provided by the bottles of water will encourage growth and protect your plants from the elements of nature. When it is time to remove the protective wall, it can be done gradually to accustom the tomato plants to the environment and encourage continued growth.