Remember the childhood ritual of bringing home macaroni art or some other little project that you made your parent’s while you were in school? Think of the pride it gave you to give such a gift. Is there really anything else that says “I care about you” any more than a thoughtful, homemade gift?
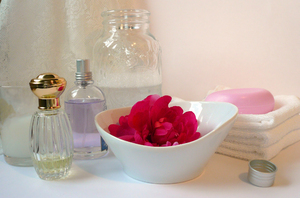
Many craft projects are deceptively simple yet yield professional results, like the making of designer soaps. What follows is an easy soap craft that gives high impact results. The soaps can be custom designed for the gift recipient and serve well as either a standalone hostess gift or as part of a larger themed gift basket.
Items Needed:
To complete this craft project you will need to assemble the following items; spray vegetable oil, toothpicks, soap coloring, glass microwave safe measuring cup, microwave, essential oils, chopping block and sharp knife, unscented clear glycerin soap, and soap molds.
If you do not have ready access to soap molds you can also use milk cartons, juice cartons or small metal cans. Clear, unscented glycerin soap and soap coloring can usually be purchased at craft stores or sometimes dollar stores relatively inexpensively.
Step One: Preparing the Work Area
Begin by preparing the mold of your choice. This is done by liberally spraying the inside of the mold with vegetable oil. Once the mold has been sprayed well set it aside and set up your knife and chopping block.
Place the glycerin next to the cutting board. Next, set out your essential oils and soap colorings alongside of your toothpicks. The pot holder goes with the glass, microwave safe measuring cup.
Step Two: Preparing the Wax
Proceed by cutting up the clear, unscented glycerin soap into one inch cubes. Place the cubes into the glass measuring cup and heat on high until the glycerin is completely melted.
Step Three: Pouring the Glycerin
Remove the measuring cup from the microwave with the pot holder and pour the melted glycerin into the soap mold. Quickly add in any drops of essential oils and soap colorings that are desired. Use the wooden toothpick to swirl around the coloring and oils. Doing so will give a marbleized look to the soap.
At this point you can even add botanicals (dried flowers) or glitter as extra adornments if desired. In addition, you can also opt to add the coloring and essential oils to the glycerin while it is still in the measuring cup in order to get a solid, even coloring to the soap.
Step Four: Removing the Soap from the Mold
Allow the soap to cool and re-solidify. This should take approximately 30 minutes. If you are in a hurry you can place the filled molds into the refrigerator to speed the cooling process along.
Once the soap has cooled turn the mold upside down onto a sheet of waxed paper and press onto the bottom of the mold to release.
If you chose to use a beverage carton as a mold just rip the carton from the soap to release it. Or, if you choose to use a can as a mold cut the bottom of the can off with a can opener and press the soap out of the can using the can’s bottom as leverage.
Your soaps are now ready to use or wrap as gifts.