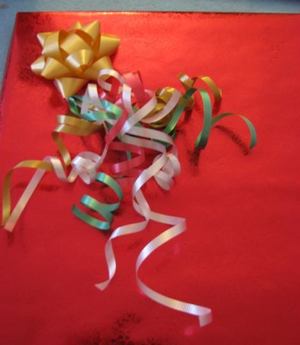
How To Make Bows Using Curling Ribbon
Curling ribbon is probably the best value for your dollar when it comes to gift type ribbon. Generally its found in 100-yard reels as single color or in the three to four color reels, still 100 yards each and at a cost of 1-3 dollars. With just one 100-yard roll of curling ribbon you can decorate 2-3 gifts dependant on their size and what you end up doing.
For those who are not familiar with curling ribbon I’ll give a bit of information about it. It is thin, about 14″ wide, ribbon with tiny lines across it. When the ribbon is held in your hand and you run one blades from a pair of scissors across it quickly it will curl, and why it is called curling ribbon. It can be found in most Christmas wrapping sections of most stores. When the holidays are over it is usually found in the greeting card-wrapping area.
The most basic of curling ribbon bows is what I call a cascade. Take any length of curling ribbon you want, I like my long so I usually do around 18-24 inches. Cut at least 6 strands and fold in half, but don’t make the fold exactly in the center of ribbon. You want to very it so you end up with many different lengths. Hold the ribbon at its center and then curl each end by running one blade of a pair of scissors across it quickly. After you have done this will all 6 strands of your curling ribbon, layer them together at the folds and tape around the top to hold them in place.
The cascade can be paired with a basic package bow, silk flower, sticker or even the nametag for the gift. They can be made in all one color or in a multi color mix. They can even be gathered together (many curled strands) into a sort of flower.
For this you will need:
Curling Ribbon (any color)
1-12″ square cardboard
Ruler
Tape
Scissors
Cut 20 lengths of the curling ribbon that are 12″ long. Fold each ribbon in half, remember don’t fold each ribbon exactly in the center as you want many different lengths when curled. After the ribbon has been folded, hold at the center and curl each end by pulling a single blade of a pair of scissors across quickly.
Place the curled ribbon in pairs of 2 each. Tape each pair to all four corners of the 1-12″ piece of cardboard. Then fill in along each side with two more sets of curled ribbon. At this point you should have a very curly flower of sorts with an empty center. Trim away the excess cardboard from the back of the bow.
In the center you can place an ornament, holiday pin, regular or fancy purchased bow, cut out a cute character from an old Christmas card and place there or how about a couple of jingle bells or small pine cones.
You can also make a cut tree out of green curling ribbon to put on the top of your Christmas gift.
For this you will need:
Green Curling Ribbon
Tape
Scissors
Ruler
Small amount of colored paper (for the star)
Craft Glue
Cut 24 lengths of the curling ribbon that are 12″ long. Fold each ribbon in half, remember don’t fold each ribbon exactly in the center as you want many different lengths when curled. After the ribbon has been folded, hold at the center and curl each end by pulling a single blade of a pair of scissors across quickly.
Place the ribbon in bundles of four each. You will begin at the bottom of the tree and work your way up. Place three of the bundles in a row and tape in place. On top of the three bundles, place two more bundles making sure you cover the tops of the previous bundles and tape in place. With the last bundle you make the top of the tree. Cut a star out of your scrap paper and glue over the tape at the top of the tree. You now have a curly ribbon tree.
Reference:
- Find More Ideas At: www.livingplastic.com


