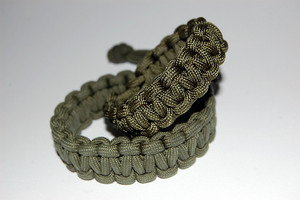
Survival bracelets make a great gift for the survivalist in your life or a great accessory for yourself. Paracord (also known as 550 cord because it can support 550 lbs of weight) made into a bracelet gives you access to 10 feet of rope that can be unraveled and used in any situation. It’s great for emergencies when camping or hiking. There are so many uses for paracord and what better way to have it handy at all times than by wearing it as a fashionable accessory?
What you’ll need
A little over 10 feet of 550 paracord in your preferred color
Scissors
A lighter
The steps
- To find out the size you’ll need to make your bracelet, take a piece of the paracord and double it over. Then wrap it around your wrist and cut the ends off where you think it will fit comfortably around your wrist. Keep in mind that the thickness of the cord you will add makes it tighter, so go a little big.
- Burn the ends (carefully) with the lighter to keep them from fraying. Then tie a knot with the two ends and make sure it is fairly big in size. This knot will be used to keep your bracelet fastened on your wrist. You should be left with a loop tied by a knot that can be wrapped all the way around your wrist. Lay this looped knotted piece of paracord flat on your workspace.
- The rest of the 10 feet of paracord is going to be used to weave the pattern. Fold it in half to find the middle. Put the middle of that longer section of cord underneath the smaller section you have laid flat. Slide it almost all the way to the top so that you have a sort of cross shape created by the smaller section being vertical and the longer section being horizontal on both sides. You want the loop above the longer piece to be just big enough to squeeze around your knot, but not big enough for the knot to slip through.
- Take the left end of the long section of paracord in your hand and form a loop on the left side with it. Then weave it underneath the middle piece.
- Then pass the right cord over top of the left cord, underneath the middle (short, separate) cord, and up through the loop you created on the left side.
- Tighten by pulling on both sides of the cord. Make sure to pull very tight as you’ll be able to fit more cord and have a sturdier bracelet if you do. Repeat the same weaving steps, but start with the right hand side. (Make a loop on the right, take it underneath the middle. Weave the left cord over the right, underneath the middle, and up through the loop on the right. Tighten)
- Repeat these steps switching from left to right in the same pattern over and over again. You want to do this until you are about ¼ inch away from the knot on the middle piece.
- Then cut the ends fairly close to the bracelet and burn both ends with the lighter again. Wet your finger and mushroom the knots by pushing down quickly after you melt it. This keeps the cord from slipping back through the bracelet. After that, viola paracord bracelet!