Every homeowner can quickly locate at least one place in his or her home that could benefit from the addition of a wall receptacle. In addition to the convenience factor, adding a new electrical receptacle to a circuit can eliminate the dangers inherent in using extension cords.
Receptacles are relatively easy to install. In fact, the most difficult part of the job is often snaking the wires to the location where you want the receptacle.
Generally, you should not have to run wires all the way from the service panel for your electricity but can pick up power from an existing circuit. The best place to tap into a circuit is at a junction box in the basement or attic, or at an existing end-of-run receptacle.
The type of cable and wire size, and type and amperage rating of the receptacle you use will depend on your application and on local electrical codes. Normally, house circuits are rated at either 15 or 20 amps. For most homes, the minimum requirements are 15-amp circuits for general use and 20-amp circuits in the kitchen. Determine the circuit rating on the fuse or circuit breaker.
You must use wire for the new receptacle, which corresponds in size with the amp rating for that circuit. A 20-amp circuit uses number 12/2 with ground (which means that two 12 gauge wires with a third ground wire). A 15-amp circuit uses 14/2 with ground.
Plastic coated cable is the easiest to work with around the home. Inside the flexible cable are the three wires mentioned, each of which has color-coded insulation: black for the power or “hot” wire, white for the neutral wire and green or bare copper for the ground. There are three categories of plastic coated cable: type NM for use in dry locations; type NMC for use in damp or dry locations and type UF for use in wet locations and underground.
Purchase a receptacle with a rating to match the circuit rating. Never use a receptacle that is rated for more amps than the circuit that it will be installed on.
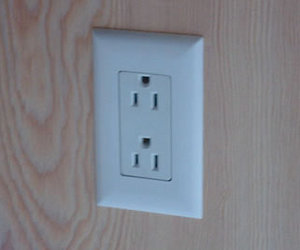
Also determine if the receptacle will be a standard two-outlet receptacle or if the application requires a ground-fault circuit interrupter (GFCI) receptacle, which protects you from shock by instantly cutting power to the receptacle when it detects a leak in current. Power returns when you manually reactivate the receptacle using a reset button. Code requires that GFCI receptacles be installed in bathrooms, garages, and outdoors. They are also recommended for kitchens, workshops, laundry rooms and damp locations. Install a GFCI receptacle in exactly the same manner as a two-outlet receptacle.
A box must protect all receptacles and wiring connections. Boxes are available in metal or plastic. A variety of styles are available to meet the various requirements of drywall, plaster, paneling, wood or other wall surfaces, and for a finished or unfinished wall. Consult your supplier or hardware store for the proper type for your project.
Needed:
Wire stripper
Screwdriver
Wire cutter
Needle-nose pliers
Voltage tester
Utility knife
drywall saw
outlet analyzer
Electrical box
Receptacle outlet
14 or 12 gauge wire w/ground
Wire nuts
Cover plate
Mark the location for the receptacle on the wall by tracing around the outer edge of the electrical box.
Cut out a hole for the box by pushing the point of a wallboard saw through the wallboard on each line and sawing to each end.
Connect cable at the source box and snake it to the new location.
Slip about 8 inches of wire through the knockout at the back of the box and anchor the wire securely by tightening the clamp screw.
Fit the box into the opening. Slit and remove the outer plastic sheath, and cut away the layers of kraft paper around the hot, neutral and ground wires.
Use a wire stripper to remove about ¾ inch of insulation from the black and white wires.
With needle-nose pliers, make a hook at the end of the black and white wires.
Hook the black wire to the brass screw on the right side of the recepticle and white wire to the silver screw on left side of the receptacle. Tighten screws securely.
Fold all wires in to the box and attach the receptacle to the box with screws. Attach the cover plate. Turn on the power. Check that outlet is wired correctly with analyzer.
First, check your voltage tester to make sure that it is working properly. Insert the probes into the openings of a receptacle you know has power, making sure the bulb lights.
Then, after shutting off the power, insert the tester probes into the openings of a receptacle on the circuit. If the bulb lights, the power is still on to the circuit and is not safe to work on. Return to the service panel and shut off power to the correct circuit, then test again twice with the voltage tester to make sure the power is off.