Ever wanted to see yourself as a cartoon character but you are terrible at drawing? There is no need to waste your time and money on art classes and drawing lessons anymore because with just a few clicks of your mouse, you can become a work of art in a matter of minutes! For this lesson, you will need a few tools: a computer, a digital photo of yourself (or others), Adobe Photoshop or GIMP (I will be using GIMP in this particular tutorial), and a few minutes of your time.
Step 1: Opening a photo GIMP: GIMP is a free image manipulating program, which can be downloaded for Windows or Mac for free by just searching for it in a search engine. Once it is downloaded, installed, and opened, go to FILE and OPEN and select the picture that you will be converting. Your photo will most likely be a .jpg or a .png file. It is best to start out with a picture that has a single subject in it, especially if you are a beginner.
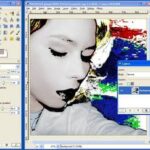
Step 2: Create a new layer: Once your photo is ready, you will need to create an additional layer in order to trace it. To do this, move your attention to the toolbar that is above the photo. Under the DIALOGS tab, select LAYERS (or press CTRL+L) and a layer box will pop up. In the layers box, click the button in the bottom left corner, which will create a new layer. A confirmation box will appear, and you should click yes. If desired, you can rename the layer. In this case, we will call it the tracing layer.
Step 3: Tracing: After all of the technical stuff is out of the way, the tracing fun can begin! Make sure the tracing layer is selected in the layers box. Then go to your tool box which should be to the left of the photo and select the pencil tool. At the bottom of the tool box, you can change the size of the pencil to suit your photo. Change it to about size 3 or 1 so that the lines will be fine. Once the pencil tool is ready, click on your photo and begin tracing, following the lines of the subjects face, hair, etc. If some parts of the photo are hard to see or difficult to trace, you may have to zoom in.
Step 4: Coloring: As soon as the entire subject is outlined it can be filled in with bright, cartoon-like colors. Again, make sure the tracing layer is selected. Then go to the layers box and click on the eyeball symbol that is next to the layer named “background”. This will temporarily hide the original picture so that you can see only your outline. Next, select the fill bucket tool from the toolbox, pick a color, and start filling. If the color goes beyond the region that you are trying to fill, be sure to check for breaks in the outline. For the skin tone and hair color, a good tip is to use the dropper tool on the background layer to pick up the original color and then fill it on the tracing layer.
Step 5: Shading and finishing up: If desired, you can use different tones and shades to create a more defined version of your character. Once you are satisfied with the tracing layer, you can either keep the background layer hidden or you can delete it by selecting it and clicking the trashcan button on the bottom right of the layers box. Next, click FILE on top of the photo and save it as a .png file.
Just to be safe, make sure you check where your file was saved before closing the program. Once everything is good, close GIMP and have fun showing off your new photo with family and friends! They will be asking you to do a version of them in no time!
Sources:
http://www.gimp.org/


