If you want to save money or just like serving your family fresh bread daily, why not learn how to bake dinner rolls at home? This simple bread baking tutorial will teach you how to proof yeast to ensure that your dinner rolls will rise beautifully. It will also teach you how to knead the dough by hand or with a dough hook and mixer. Finally, this bread baking tutorial will teach you how to shape your dinner rolls, and how to store the dough over several days to give you the opportunity of baking fresh bread daily without actually making dough every day. Here’s everything you need to know to bake delicious dinner rolls from scratch.
Here’s What You’ll need to Bake Dinner Rolls
– Soup bowl and a mixing bowl
– Mixer and dough hook (optional)
– Plastic bags and kitchen towels
– Lukewarm water and milk
– Sugar, honey, salt and oil
– Access to an oven
Follow These Steps to Bake Dinner Rolls from Scratch
Step 1: How to Proof the Yeast
Though many bread making recipes advise you to toss the yeast in with the other ingredients, professional bakers always proof their yeast. For one thing, you can make sure that the yeast is still active (alive). This will also improve the flavor of the yeast. To proof the yeast for baking dinner rolls fill the soup bowl with 3/4 cup of slightly warm water. Sprinkle 1 tbsp of yeast over the water, then sprinkle with sugar to feed the yeast. Cover with plastic bag and kitchen towel for 5 to 10 minutes.
Step 2.1: How to Prepare the Dinner Roll Ingredients for a Mixer
When you bake dinner rolls, it’s important to keep in mind that oil and salt will kill the yeast. Therefore, how you put your dinner roll ingredients in the mixing bowl is all important. First put 3 cups of bread flour in the bowl, then pour in 3/4 cup of slightly warm milk (which you can warm in the microwave). Pour 1 tbsp of oil to the sides of the flour, followed by one tbsp of honey at the center (the oil will sleek the spoon and make it easy to get the honey off next). Finally, sprinkle 1tsp of salt to the side also, well away from the center.
Step 2.2: How to Prepare the Dinner Roll Ingredients for Kneading by Hand
When baking dinner rolls by hand, prepare a clean work surface like a countertop or island. Place 3 cups of flour in a mound. Dig a hole at the center of the mount and pour in 3/4 cup of slightly warm milk (which you can warm in the microwave). Pour 1tbsp of oil on the periphery of the mound and 1 tbsp of honey at the center. Finally, sprinkle 1 tsp of salt on the edge.
Step 3.1: How to Add the Yeast and Mix the Dinner Roll Dough with a Mixer
The yeast you proofed should be foamy and frothy by now (see picture). If not, the yeast is dead and you must proof new yeast instead. If the yeast looks good, pour it into the center of the flour and turn the mixer on, using the mixer accessory you typically use for cakes. Once the dinner roll dough starts to get sticky, place flour on your hands and wipe the sticky dough off, so as to replace the mixer attachment with a dough hook. Continue adding about 1 cup of flour slowly as the dinner roll dough is being kneaded by the mixer, until the dough looks satiny. Do not turn the mixer on high as this will heat the dough and cause the yeast to start working too soon.
Step 3.2: How to Add the Yeast and Knead the Dinner Roll Dough by Hand
The yeast you proofed should look foamy and frothy by now (see picture). If not, the yeast is dead and you must proof fresh yeast instead. If the yeast looks good, pour it into the center of the flour mound (away from the oil and salt) and start mixing with your fingers, slowly bringing the exterior ingredients into the center. The dough will be very sticky, but keep working at it for 5 minutes. Start to add flour while still mixing the dough, as it begins to take shape, start folding it and pressing it down, then folding again. Keep adding flour until the dough stops to being sticky. Knead for 10 to 20 minutes until the dough is silky smooth.
Step 4: Prepare the Dinner Roll Dough for Rising
Smear a large bowl in oil using a paper towel, then place the ball of dough inside. Roll it so the exterior of the ball of dough becomes coated in oil which will prevent it from crusting. Cover the bowel in a plastic bag, then cover the bag in a kitchen towel. I like to place my dinner roll dough in the oven for rising. I first heat spray the oven with water, then heat it for 40 seconds. Then I turn the oven off and place the bowl of dough inside to proof for 1 hour. After an hour, the dough will have doubled in size (see picture). Before moving on to the next step in baking dinner rolls, turn on the oven to 350°F.
Step 5: Shape the Dough into Dinner Rolls
The best part of baking dinner rolls is shaping the rolls into whatever shapes you like. Begin sprinkling your work surface with flour, then taking it the puffy dough and punching it a little to take out some of the air. This will prevent air bubbles from forming in the dinner rolls you are baking. Use a sharp knife to cut the dough into slices, then shape the slices as follows. To bake the quickest, simplest dinner rolls, roll each slice of dough into a ball. You should end up with 9 balls sitting in rows of 3 in a square pan. You can also roll each slice of dough under a flattened palm to create a snake. Press two snakes together and twirl them, for bread-stick like dinner rolls. Alternatively, place two balls of dough in each compartment of a muffin pan. Brush the dough in melted butter or egg, then cover the pans with a plastic bag and towel to rise again for 30 minutes.
Step 6: Bake the Dinner Rolls
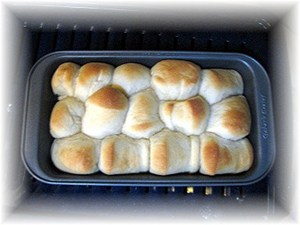
Increase the heat of the oven to 355°F, then spray the walls with water and place the dinner roll pans on the middle rack, shutting the oven immediately. Reduce the heat to 350°F, which is where your oven will probably be anyway after you’ve opened the door. Bake the rolls until they turn golden brown (between 12 to 17 minutes depending on the size of the dinner rolls).
Step 7: Cool the Dinner Rolls
Place the baked dinner rolls on a grill pan, to prevent condensation from wetting their bottoms. Eat while they are fresh.
Step 8: Save Some of the Dinner Roll Dough for Tomorrow
To give you the luxury of baking dinner rolls daily, without actually making the dough, prepare two portions of dough at once, then place one in the fridge after it finishes rising. Roll the dinner roll dough in a plastic bag and a kitchen towel and leave in the fridge. The bread will continue to rise in the fridge, but that’s perfectly fine. Keep the dough up to 3 days only. When you are ready to bake the dinner rolls let the dough return to room temperature for 30 minutes to 1 hour, then pick up from step 5, turning on the oven to 350°F. For more tips, read my article on baking bakery-quality bread at home.