If you are planning on building a patio, why not try using flagstones? Flagstones are easier to install than concrete and very durable. They have a non-slip surface and there are a variety of colors to choose from. They come in green, brown, red, pink, beige and other colors in between. You can match your exterior paint with any of these colors. Flagstones can be purchased from your home improvement stores or garden centers. Installing flagstones is not that difficult to do. With a little creativity, patience, and elbow grease, you can finish this project in one weekend.
Materials:
Flagstones
Plastic edging
Masonry sand
Wheelbarrow
Shovel
Compactor – can be rented from any home improvement store
Level
Masonry saw – can be rented from any home improvement store
Push broom- for leveling sand
Spray paint – for marking the areas to cover
Safety goggles- for eye protection
Dust mask
Work gloves
Instructions:
Preparation and laying flagstones:
1) Measure the size and shape of your new flagstone patio. When you know how big the patio would be, use spray paint to mark the outline. For a beautiful effect, try use curves so that the design is not too rigid.
2) If your back yard has existing lawn, remove it. If none, then get rid of debris and weeds. Then, using a shovel, dig to a depth of about 5 inches and smooth out the bottom. The hole should deep enough to accommodate the sand base you are going to build. Furthermore, you have to consider the height of the flagstones. The finished height of the patio should stand about 1/4″ above the surrounding ground.
3) Use edging around the outline that you made earlier on step 1. Make sure to use plastic if you want to outline the curve since it is bendable. Set the top of the edging slightly below ground level, then secure the edging with galvanized nails to keep them in place.
4) Pour in sand, use the ones that are fine. Use the rented compactor to pack it down. Make sure that you establish a solid 3″ base of sand.
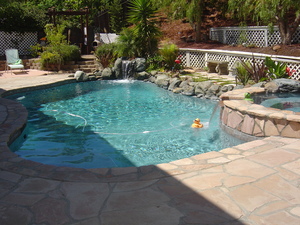
5) For proper drainage, make sure that the sand is not level; the base should slope away from your house. Install a couple of drainage holes if you have a huge patio like shown on the picture. This way, the water will go through the drainage holes instead of creating puddles.
6) Start laying down your flagstone in the hole. Since these flagstones are irregular in shapes and sizes, try to move them around and figure out what the final look or arrangement would be. As much as possible, use the bigger ones to cover bigger areas to minimize the amount of cutting you’ll need to do. If you do need to make cuts, mark the stones where you want to cut them. (Read the instructions on cutting flagstones below).
7) Remove the stones when making the cuts, then lay the flagstones back into the base after cutting.
8) Using a push broom, partially fill the seams between the stones with sand. The push broom can help get the sand in between cracks. Then, run the compactor over the finished surface to pack the sand into the seams.
Cutting flagstones:
1) Use a scrap of plywood and lay it on the ground to cut your flagstones on. If you do not have scrap plywood, use a work bench.
2) Cut your flagstones with the masonry saw that you can rent from a tool supply rental, or home improvement store. If you have a circular saw, you can use a masonry blade that you can buy or rent, however, this may not be as powerful as using masonry saw which can make the job quicker and easier. If you want to cut with uneven edges, you can use a pick or small ax to crack the flagstones.
Pointers:
Make sure to use safety goggles for your eye protection before starting work. Use dust mask as well while cutting flagstones.
Using work gloves can protect your hands from possible injuries.
If you do not have a sand compactor, use a 4 x 4 to help level the sand.
Use a water hose to clean the flagstones and also help settle and solidify the sand.