Hatching eggs in an incubator successfully takes a little knowledge and preparation. Eggs need the proper amount of heat, humidity, turning, and a little luck.
Before you even get your hatching eggs you need an incubator. A small incubator can be bought at local feed stores, hardware stores, or even online. They can hatch anywhere from 3 to 48 chicken eggs at a time. Some accessories which you may find helpful include a fan kit to circulate the heat, and an egg turner to turn the eggs automatically.
After you buy your incubator you can get your hatching eggs. If you’re lucky enough to have laying hens and a rooster you’re in business, if not you can buy your eggs locally. Check the bulletin boards at the feed store. Many states have agricultural papers called market bulletins. If all else fails you can buy your eggs online. Just make sure you are purchasing fertile hatching eggs. Also, keep in mind that the hatch rate of eggs bought through the mail drops a good bit, with 50% considered a good hatch.
Before your eggs get to your house plug in your incubator. Having it ready for your eggs is a must! You want the temperature to be 99.5 degrees, so a thermometer in the incubator is important, also. Make sure you set your incubator in a draft free place in your home where the temperature stays pretty constant.
Humidity in your incubator is also important. Read your incubator instructions, and put water in the correct place. You can purchase low cost combination thermometer and humidity gauges at your local Walmart or a hardware store. You want your humidity to be 50% for days 0-18 and 65% for days 19-21. I recently bought a combination thermometer and hygrometer for under $20 from a reptile supply store that I am very pleased with. It’s digital and very small, fitting into my incubator very nicely.
If you have ordered hatching eggs through the mail make sure someone is home when your eggs arrive. You want to go ahead and bring them in, and not leave them setting out in the weather. Let your eggs rest for at least 8 hours before putting them in the incubator. They have been on a rough trip, and need some time!
For me, an automatic egg turner is a timesaver. If you don’t have an automatic turner be sure to mark your eggs in PENCIL with X’s and O’s. You will need to turn your eggs at least 2 times a day from days 1 to 18, and the markings will it easier to know which ones you have turned. If you do have a turner, set it in your incubator and plug it in. You then can add the eggs with the pointy side facing down in the turner or on their sides without. Put the lid on and only open the incubator to check the water level. After this I always mark my calendar as to the day I put my eggs in, the 18th day and the 21st day so I’ll know when to expect my chicks.
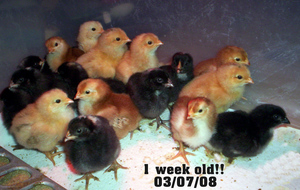
On day 18 take the turner out of the incubator, and except for checking the temperature and humidity, leave the eggs alone. Chicks should start hatching on day 21. Leave newly hatched chicks in the incubator for 4 to 24 hours to dry. The dry chicks can then be moved into your warm brooder and given food and water.
Hatching your own chicks does take some care and work on your part, but to me nothing is sweeter than holding a little baby chick that you helped bring into the world!