When crayons break or become too short, many people throw them away and buy new ones for their kids. The new ones will also eventually end up broken. Others have purchased expensive toys that are made especially to melt and reshape crayons, but they look much more promising than they really are. Double boilers and costly gadgets are never necessary. I have been melting crayons and making discs and other shapes for the past few years. I began melting them in my oven after I was unable to find the aforementioned toy for my daughter. Thankfully I never did find it since I was told by a friend that it did not work as expected. Use these easy ways to melt crayons in your oven, and forget about costly toys and messier methods. You can create colorful discs and more.
Necessary Supplies to Melt and Make New Crayons
To melt crayons in the oven you will need a muffin tin and liners or a nonstick pan with individual designs. I prefer using silicone molds since they are flexible and available in countless shapes and designs. They are not a requirement, but the finished shapes pop out very easily when cool.
My personal favorites were shaped like oak leaves. My daughter and I chose autumn colors to create the crayon leaves. We made some in a single hue, and others were color blocked. We created the color blocks by placing broken pieces of various colors in the same mold.
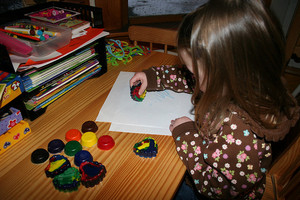
Needless to say, you will also need dozens of broken crayons in colors of your choice. Sort them according to color, or plan on creating rainbow discs or shapes. Rainbow discs are unique, but they are not nearly as practical since kids enjoy choosing colors when creating works of art. I combine various shades of the same hues to come up with my own colors. It is a fun project for kids and adults alike, and it is something that parents and kids can enjoy doing together.
Procedure
To melt crayons in the oven, begin by peeling off all of the paper. Also, they should be clean and free from fuzz, hair or anything else that you would not want in the mix. If they are not already broken, break them into pieces that will fit the molds. If desired, use paper liners. The crayons should not stick to clean pans, but after they melt and solidify again, they will be easier to remove from metal tins.
Turn the oven to 200 degrees Fahrenheit. It is not necessary to preheat it. Place the tins or molds on a center rack, and keep a close eye on wax. The crayons should melt but not bubble and cook. If they are kept in the oven too long, separate colors will blend completely together.
Once the crayons melt, remove the tins or molds from the oven, and allow them to cool completely. Do not try to remove the shapes too soon. They must be solid and cool on the outside. They should pop right out when the molds are over turned and lightly tapped on the counter.
Source: Personal Crafting Experience and Experimentation