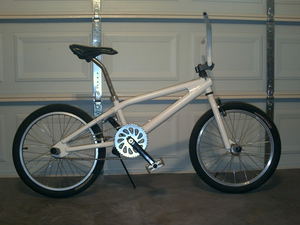
When you ride BMX you can expect to bend a rim or two over time from hard landings and curb hits. Sometimes BMX riders call this a “Tacoe’d Rim”. Your spokes and hub may still be in good working order so to save a little money you can lace your old hub and spokes onto a new rim. All you need is a screwdriver and a spoke tool.
First make sure that the spokes aren’t bent too badly and your old hub is in good shape. Remove the tire and tube if you haven’t already. Get a new rim and hold it right next to the old one and line up the valve stem hole to where it matches the bent rim’s valve stem hole. This is directional so make sure that the first spoke hole on the new rim is in the same position as the old one if they are in a “left, right, left” pattern. Make sure you have the same number of spoke positions on each rim and that both rims are facing the same direction as far as the spoke positions are concerned.
Now take the the first spoke after the valve stem (to your right) and unscrew the spoke nipple carefully. Note how far the nipple is on the threaded end of the spoke and when you transfer it to the new rim keep it a few turns below where it was originally. Now repeat this step, skipping every other spoke, until you have laced one entire side of the new rim with the old spokes. You may have to slightly bend each spoke to remove it from the old spoke hole and place it into the new rim’s spoke hole. Once you get back to the valve stem hole make sure that each spoke is just a little loose all the way around but the nipples are close to the same distance above the spoke on the side that the spoke attaches to the rim (inside the rim where the tube and tire go). Now continue moving one spoke at a time for the other side of the hub to the new rim.
Once you have all of the spokes transferred over to the new rim you can dispose of the old rim and start snugging down all of the nipples onto the new rim. Make sure that you only turn each nipple a couple of turns until all of the nipples are snug and very close to the same depth. It is important to get each one the same so that all of the tension is even across the new rim. This will ensure that the rim is “true”. Continue going around the rim and tightening down each nipple until all of them are the same height and tension.
Now place the rim onto your bike and set the brakes to where they are very close to the rime but are not touching the rim. Use the brakes position to determine if the wheel is straight and true. If the rim touches on one side of the brake pad then tighten the spoke on the opposite side one half turn. Spin the wheel and judge the distance from each side with the brake pad and making adjustments on both sides until the wheel spins freely between the brake pads without touching either side of the rim. Never adjust more than half a turn at a time as this can throw a very close to true rim out or cause undue stress on the new rim or hub.
Once you get the wheel nice and true replace the tire and tube and take it out for a spin. Bounce the rim gently and squeeze the spokes above the nipples a few times to settle the spokes and rim into place. Now the spoke tool comes in handy since you have the tire and tube mounted onto the rim. Flip the bike over after about 3 miles of riding and settling in the spokes and run the brake “true” test on the spokes again. Use the spoke tool to turn the spoke nipples one quarter turn in or out according to what the rim needs in order to be true.
Now you should have a completely true rim that is tight and snug around all of the nipple points. Make sure you do not over tighten any one spoke or groups of spokes and that none of them are loose. Have fun and save money while maintaining your own BMX bike!