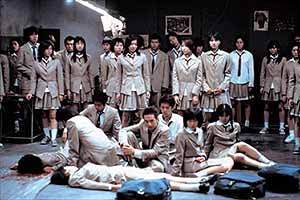
It constantly amazes me how quickly an ordinary photo can be turned into something truly spectacular. I’ll be the first to admit that I’m a total Photoshop nerd, so maybe this all falls into that same thing … but I can’t help the amazement.
What are Dreamy Photos? They’re the shots you see with the soft edges, the luminescent skin, the colors that look too brilliant to be real – because they’re not real. Dreamy photos have that misty, glamorous glow. In 3 quick steps they turn a snapshot into something you’ll be proud to frame.
They’re the effect that certain shall-remain-nameless companies have made big bucks on bundling into actions that you don’t even need.
Seriously – three steps. What do you need? Well, you won’t need any plugins, brushes, or anything else. You’ll need Photoshop in a version from 7 through the current CS2, and a photograph. That’s it. Some other graphic editors like GIMP that have the same layer capabilities as Photoshop will also work.
Three Steps to Dreamy Photos
1. Open your image in Photoshop. Any photograph will work, but solid colors help this effect immensely. In particular, a lot of whites will create a beautiful angelic effect and reds burst into life brilliantly. In the end, though, you’ll never know how it might look if you don’t give it a try.
Once your image is open, make sure it’s in RGB mode (Image, Mode, RGB). Then, right-click the original layer and choose “Duplicate Layer”.
2. Now we’re going to blur our duplicated layer. This is an important step because it is what causes all the main colors to widen, the highlights and shadows to become more prominent and fade everything else into obscurity.
Click “Filter”, choose “Blur”, and click “Gaussian Blur”. Gaussian Blur provides the softest, most uniform blur. Clicking this option kicks up a new dialogue. Enter “15” in the dialogue but keep an eye on your preview. What you’re aiming for is something that wipes all features away but leaves the overall shape of things intact. (See Illustration 02)
3. I said three steps, right? Well, I wasn’t being misleading. This is our last step and provides all the “magic” to this effect.
Above your layers palette is a drop-down box that currently shows the word “Normal”. This is your layer modes drop-down box. Click it and choose “Overlay”.
Now, isn’t that the most gorgeous, dreamy photo you’ve ever seen?
Reference:
- My-Photoshop – Tutorial and Plug-In site dedicated to Photoshop – www.my-photoshop.com ; Good-Tutorials – Huge Photoshop database – www.good-tutorials.com – or visit all of AC’s tutorials listed on Good-Tutorials here. ; Pixel2Life – Another Tutorial database, this one is much more than Photoshop – www.pixel2life.com


