Many people stumble upon issues with their automobile. When you have an automobile, it is very important that you learn as much as you possibly can about it. Many people simply rely on the fact that they know the make and model, what color the vehicle is, and how to drive it. However, if you have an automobile, it is extremely important to know a lot more than the basics. One of the many issues that may arise with your automobile is an alternator that goes bad. Dealing with a faulty alternator can be extremely frustrating, and challenging. However, this is one of the easiest parts to work with when it comes to automobile maintenance. In this article, we will take a closer look at diagnosing and repairing alternators in automobiles.
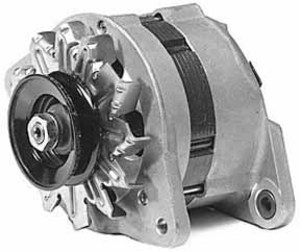
If you are looking to understand how one may go about diagnosing and repairing alternators in automobiles, it is first important to understand what an alternator is. Basically, an alternator is a way that an automobile powers various electrical components. An alternator takes the power from the battery and converts it into a compatible form of electricity in order to ensure that your automobile functions properly. If it were not for an alternator in your automobile, you would not be able to power on the lights, the radio, and many other electrical components. Additionally, an automobile will be unable to start if an alternator is faulty.
Now that you understand the basics of an alternator in an automobile, we can discuss how one can diagnose and repair alternator in an automobile. The first step is to ensure that the alternator is the issue at hand. The first thing that you should do is to review your electrical system carefully. You should check for loose wires, connections, and any type of corrosion. Once you have completed the visual inspection, you may consider moving the wires around a little while the vehicle is running. If you do this, and something cuts out, you may be facing an issue with wiring.
The next thing that you can look for when you are diagnosing and repairing an alternator in a vehicle is to inspect the belt that latches on to the alternator. Over time, alternator belts can wear out and possibly even break. If this is the case, the alternator in the automobile will not function properly. The next step you can take when diagnosing and repairing an alternator in an automobile is to test and visually inspect your battery. It is important that all of the cables are secure and have no visible signs of corrosion. If the battery is not maintenance free, you should also make sure that there is plenty of water in the battery. If everything appears to be fine in the visible inspection of the battery, you should try to charge the battery. If the battery charges, but dies as soon as you take the jumper cables off, chances are that you have a faulty alternator.
If you find when you are diagnosing and repairing an alternator that it is, in fact, faulty, you should replace the part immediately. You can choose whether to rebuild the alternator in the automobile, or replace the alternator with a new part. I suggest, for practical purposes, to simply repair the faulty part by buying a new part. Though this may cost more initially, the new part will last longer and is well worth the expense. When purchasing your new alternator, it is important to take the faulty alternator with you so that you do not have to pay a core fee. This can save you a lot of money in the end.
The first thing that you should do prior to replacing the alternator in your automobile, is to make sure that you can do all that you are able to remain safe. You can start by completing disconnection the battery, or simply removing the ground wire from your battery. This will ensure that you do not experience any type of electrical shock. The next thing that you should do to ensure your safety is to have another person with you at all times in case of an accident.
When you are diagnosing and repairing an alternator in your automobile, it is handy to have a manual that is specific to your vehicle. These manuals will teach you many important things about the inside workings of your vehicle and how to perform various types of tests and repairs. Once you have acquired this, you are well on the road to diagnosing and repairing an alternator in your automobile.
Once you successfully locate the alternator in your automobile, you should take it out carefully. The first thing that you should do when removing the alternator is to remove the belt that runs along the side of the alternator. It is important that you remember how the belt is placed on the vehicle to ensure that you can put it back on properly once you are ready to put the new alternator on.
Once you have removed the belt, you should set it to the side and look for a wire that is attached to the alternator on your automobile. You should carefully remove the wire that grounds the alternator and then you should remove the wire that runs positive, or “hot” on your alternator. Keep in mind how these wires were attached to ensure that you reattach them correctly later.
Once the wires are removed from the alternator in your automobile, you should try to locate the two bolts that keep your alternator in place. In some vehicles, these bolts are on either side of the alternator. In other vehicles, these bolts are secured on the top and the bottom of the alternator. The bolts are large, and usually easy to locate. Once you find them, loosen them slowly and carefully. You will find after you loosen the bolts on the alternator that the part is ready to be removed. Once you remove the part, it is extremely important that you fasten the bolts back on to ensure that you do not misplace them.
Now that you have removed the alternator from your vehicle, you are ready to make a trip to the local parts store. Prior to committing to purchase a new alternator, it is important to see if the store can test your part. This step is necessary just to ensure that you are correctly diagnosing and repairing the alternator in your automobile. Once it has tested faulty, you can then continue with your purchase for a new alternator.
When it comes to replace the new alternator on your automobile, go home and ensure that the battery is still disconnected. If it is, you may continue with replacing the alternator. If it is not, you should then disconnect it and continue. Place the new alternator in the appropriate holding area under the hood and replace the bolts that you took off earlier. Once you do this, the alternator will be secure. You should then replace the ground wire, then the “hot” wire. Once this is completed, you should replace the belt in the same manner it was taken off.
Once all of the pieces are put back together, you can reconnect the battery on your automobile and try to start the vehicle. If it starts and everything is functioning normally, you have successfully completed the task of diagnosing and repairing an alternator on an automobile!


