As a teacher you know how important it is to incorporate visuals into your lessons. Take your lessons on Ancient Egypt to a new level by creating your own Hieroglyphs to display. It’s easy. Here’s how to make Hieroglyphs for your classroom.
Name It
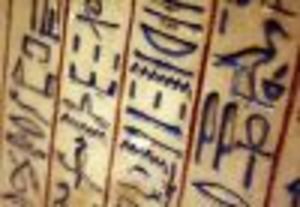
First, visit a Hieroglyphs website. There are quite a few of them out there but we recommend this one. http://hieroglyphs.net This site allows you to write whatever name or word you want in the source field and interprets that word or name into ancient Egyptian. Be sure and point out to your students that whichever way the creatures are facing on the Hieroglyh is the side you begin reading on. Birds looking left means read from the left. Birds or creatures looking right means read from the right. Print the Hieroglyph on a transparency that you will use later.
Get Your Supplies
Next, you’ll need to make a trip to Lowe’s or Home Depot. You’ll need to purchase these items.
1 2 x 4 sheet of Styrofoam per hieroglyph
1 pack of sponge brushes
1 wide mouth black Sharpie
Craft or acrylic paints in these colors, sand or tan, red, blue, green
From your school you’ll need the overhead projector. You’ll also need a small paring knife and a box cutter.
Your Work Area
Foam is an easy medium to work with. They only real downside is that it is pretty messy. Once you start cutting into that foam, white beads will begin to fly. Work in an area that can be messy a little while. You’ll need some time to work without cleaning the mess. You’ll also need a table to work on. Cover your table with a drop cloth or garbage bags so you don’t get paint on your table while working on your Hieroglyphs.
Design Your Sign
The reason I love foam to make Hieroglyphs with is because it so easy to work with and easy to make it appear like stone. The stone look gives your Hieroglyphs a more authenic look. Have fun and be creative with your sign. Use your projector and transparency and draw with your marker the Hieroglyph onto the foam. When you are done lay the sign on the table. Use the box cutter to begin cutting out the design to give your Hieroglyph a 3-D look.
With the sand or tan paint, paint the whole sign including the edges. Allow it a few hours to dry properly. Check the crevices to make sure you have all the white beads covered. When that’s done, outline the symbols again with your marker.
Paint the symbols with vibrant primary colors like the ancient Egyptians did. After the paint is dry, draw the lines again with a permanent marker. You now have a beautiful Hieroglyphic sign that you can enjoy year after year if you store it properly.


