Kids are hard on their clothes, especially jeans. They play hard, and their clothes show it. Pre-school and school-age boys are more likely to tear the knees out of their jeans crawling around playing trucks than they are to outgrow them. It can be pretty tough on a family budget having to replace clothing every couple of months.
Use this easy project to design great looking pants and rejuvenate a torn pair of jeans.
Here’s what you need, and you’ll find it all in the craft section of a local store:
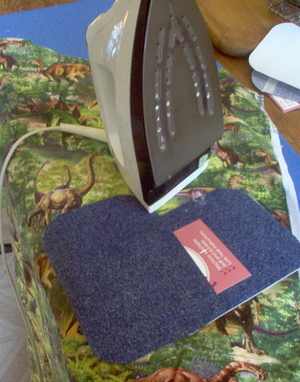
Iron-on patches
Any fabric in a desirable print or theme
Iron
Ironing surface
Scissors Sewing Machine or needle and thread* (*this is optional, but is the best bet for lasting patchwork)
When choosing a print, pick something your child likes. A boy that is into dinosaurs or trucks will love the look. To make your sewing life easier, and still have a great looking pair of patched pants, use a plaid; it will require less matching up with the hole opening.
What to do:
~(Optional) Trim away threads and frayed edges from the hole you are going to patch. If you like the look of the fray, leave the hole as it is.
~Cut a section of fabric from the print you have chosen, large enough to fill in the ripped gap, but smaller than the iron-on patch. Try to fill the gap, but leave some patch free on all sides of the fabric print.
~Place the fabric print in the center of the patch on the ‘wrong’ side of the patch. The ‘wrong’ side will be the side that has the iron-on adhesive on it, not the plain denim side that would usually be showing.
~Using a hot, dry iron, iron just a portion of the center of the fabric print with the tip of the iron. You want to heat enough of the adhesive to tack the fabric print in place, but you do not want to touch the exposed adhesive. The whole piece of printed fabric will not yet be secure. This will be done in the next step. Right now you are only trying to prevent the fabric from moving around when you apply the patch to the jeans.
~Bring the patch with the print attached to it inside the jeans, and line the patch up behind the hole. Iron with the hot, dry iron around the surface of the patch to hold it in place.
~Turn the jeans inside-out, being careful not to tear away the freshly ironed patch (it is not yet secure).
~Iron the back of the patch on the inside of the jeans (you will now be ironing the ‘right’ side of the patch). Circle over the back of the patch (right side) until all the adhesive is secure to the jeans. Pay attention to iron down the edges.
~Let the patches cool for a few moments, then turn the jeans right-side out again.
~The patches are now secured with the iron, but for a long-lasting fix, it is best to stitch around the outside of the hole or patch so that it will remain in place through rough play (the reason we’re here!) and repeated washings. Use any stitch you like on your machine; a zigzag stitch or outline stitch can add decoration, or just use a straight stitch if you prefer. Match the thread to the denim or coordinate it with the print. If you do not have a sewing machine or are not skilled in the use of a sewing machine, hand stitching will work just as well. The sewing is meant just as a backup.
Stitching the narrow jean legs on the machine is a little tricky. Remove the table section of the machine to expose the arm. Feed the jeans onto the arm. Stitch in a circle, oval, or square around the patchwork. You will probably have to sew the top half and a side, then use a reverse stitch to finish the bottom and remaining side, meeting up where you started. Larger legs are easier because they move more freely on the arm.
This step can skipped entirely, but again, the iron-on patches won’t stay secured as long.
With that, your jeans will be whole again. The fabric print you chose will show through the original tear for a trendy look, making your kids fashionable in their patched-up jeans. You’ll keep a few dollars in your pocket for when your kids outgrow their wardrobe in another month or two, and save yourself the expense of constantly buying replacement clothing in the same size.