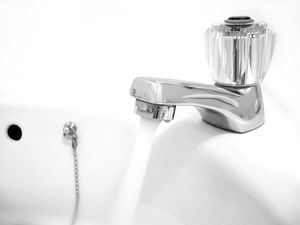
One of the first things to go wrong with most RVs is the sink faucets. The reason, most of them are made of cheap plastic (although they may be chrome plated on the outside). Replacing these is a fairly simple procedure, but it’s one that you’ll want to follow to the letter so you don’t get water damage. Here’s how to replace RV sinks.
Step One:
Find the supply of water that powers your faucet and turn it off. Having this turned on, even without having the water running could be disastrous.
Step Two:
Turn both the hot and cold water valves all the way open. This will bleed out the remaining water pressure in the tubes, letting the water drain away from the faucet and limited the amount of possible spillage.
Step Three:
Use a basin wrench to disconnect the water supply lines from the faucet. You’ll likely have to feel your way around as there won’t be much room to see what you’re doing, and you’ll need the wrench to break the seal. Once you’ve done this, be sure to keep the supply lines separate. When you reconnect them later, you’ll want to know which is which so the hot water goes with the hot water valve and the cold water with the cold water valve.
Step Four:
Remove the faucet itself. There should be two or three wing nuts holding the faucet in place in the counter top. Remove these and take the faucet off.
Step Five:
Go shopping for your new faucet. Take the old faucet with you to the hardware store. You can get any kind of faucet you want, really, but the connection on the bottom where the water supply lines will connect to need to have the same size threading. Also, some faucet mountings require 2 wholes for wing nuts, and others have 3 wholes (as was previously mentioned in step four). These two aspects of the faucet needs to match the one you’re replacing. If it doesn’t, your task becomes significantly harder.
Step Six:
Clean the counter where the new faucet will go. Make sure there is nothing to get in the way of the connection and seal.
Step Seven:
Do everything in reverse order of how you removed it. Mount the faucet mounting plate with wing nuts, re-connect the water supply lines using your basin wrench to make the connection tight. (make sure that the hot water line goes to the hot water valve, and the cold water line to the cold water valve).
Step Eight:
Put a layer of plumbers putty between the faucet and the counter to make a seal to prevent water leakage. Turn on the water supply to test for leaks.
Know that you now how to replace an RV sink faucet, it shouldn’t be much trouble. Just make sure that your old faucet and new faucet match up for anything under the counter!


