Using a data projector can be very simple and easy or it can be a rigorous challenge, depending on if you know how to use the piece of machinery. As a college student working at a technical facility that rents out laptops and data projectors, I guess you can say that I know a thing or two about data projectors. First let me tell you about their various uses, functions and how to operate them.
Data projectors are meant to project an image on a wall or big screen. Where do these images comes from you may ask? Well, have you ever wanted to give a presentation in your work office or a classroom presentation on a college campus but didn’t know how to show the image and slide presentation from your computer to the rest of your class? A data projector is what you need. The data projector takes the image from the word document, Excel, slide show presentation or an internet website or clip and can show it to the class on a large projector screen that comes down out of the ceiling in college classrooms or it can be projected onto a carry on screen that ranges from 6 to 12 feet in height.
How is this done?
Very good question. First the data projector should come with a cable called the VGA cable. This VGA cable connects from the back of your laptop to the side or back of the data projector, depending on where the outlet for the cord is. Both ends of the VGA cable look exactly the same and are the same so it shouldn’t matter which end you put where. The VGA cable has a small knob where the plug goes into the laptop or the data projector. This is used to tighten the grip of the cord onto the laptop or data projector. The data projector also comes with a power outlet cord. One end of the cord looks like a regular plug that goes into the wall outlet for the electricity to turn on the data projector. The other end looks similar to the cable end of the data projector and hooks up into the other outlet end of the data projector. The data projector usually only has two sockets so you can’t miss where to put the cords in.
Now that I’ve gotten the cords in place, how does it work?
The first thing you have to do is turn on the data projector first. Turn the laptop on last. This is very important because many people turn the laptop on before the data projector and don’t get an image and then complain that the data projector isn’t working. Make sure you turn the data projector on first. Turning on the data projector is done two ways, depending on the model of the projector. For some of them, you have to hold down the power button for a few seconds and wait patiently for it to start up. Most of the time a red light will flash which means the projector is being turned on. Then it will turn green which will signal that it is ready to be used. In other data projectors, sometimes you have to hit the power button once and then tap the input button. This also will go from a red to green light. When the projector has been fully turned on, you should get a blue screen appearing on the wall or screen. This means that everything you have done is correct. NOW, you can turn on the laptop and go to the main screen. By this time, an image of your laptop screen should appear on the screen or wall.
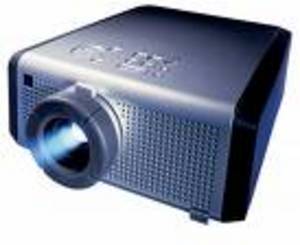
In other helpful tips in using the data projector, you can adjust the lens of the data projector to zoom in or zoom out of the image or to refocus the image. You will need to adjust the big lens cap sticking out of the projecting order to do this.
One last thing: Make sure that the lens cap of the data projector has been removed. Some people have told me that they didn’t see an image from the projector. I couldn’t figure out what was wrong with it until I asked them if they had removed the lens cap and they said “no.”
My last bit of advice: Be patient with all technical equipment. You are dealing with a piece of equipment worth several hundred dollars. Wait a few seconds or minutes if you have to for the data projector to complete all functions. In many cases, a tilted leg stand slowly comes out from the bottom of the laptop. Be careful not to smash this leg when moving it. In addition, when the laptop is shutting down, wait for the lens cap to close before shutting the cap because you don’t want to break it.
Stay tuned to my next technical equipment article about using Tripod Camcorder and Camera holder. Until then, so long!


