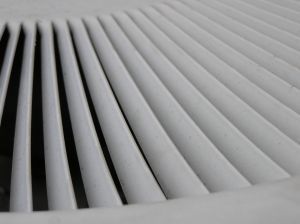
Sitting in my living room this week staring at my ceiling I noticed something quite horrible – – the vents in my ceiling are filthy. I am not a clean freak; however, I do keep a tidy home. I am also careful about dust because our daughter has asthma. I immediately decided to clean all of the air vents in our home that day and recruited my family to help with this task (they did not see the urgency in this but grumbled their way through it). I have now added cleaning the air vents to my master spring cleaning list (and the fall cleaning list too) so that I will not forget. Some tips I picked up while cleaning the vents might be of some interest to those of you still sitting on your couch staring up at the ceiling trying to remember the last time you cleaned the vents.
1. Turn off the air conditioner/heating unit. Before cleaning the vent covers, make sure the unit is turned off. There is nothing worse than getting a face full of dust and debris when you are standing on the ladder trying to balance yourself.
2. Cover the floor and furniture with drop clothes or an old sheet. There is no reason to make a bigger mess to clean up when you are trying to clean the vents. It is much easier to roll up a drop cloth and take it outside than it is to dust and vacuum every inch of the room when you are finished cleaning the vents.
3. Wear protective clothing. It is also a good idea to wear a hat or wrap something around your hair before you begin cleaning the vents. Dust and debris will fall out of the ducts when you remove the vent covers. Wearing old cleaning clothes goes without saying.
4. Take the screwdriver with you when you climb the ladder. Unless you are positive that the screws holding the vent in place are the kind that simple “twist” off, go ahead and carry a dual-ended (both Phillips head and straight head) screw driver up the ladder with you. It saves you trips as well as your kids laughing at you.
5. Prepare a bucket of warm soapy water before taking off the first vent cover. It is easier to clean the vent covers if you allow them to soak while you are removing the next cover. As you remove each vent cover, place it in the bucket to allow it to soak while you are removing the remaining covers.
6. Clean in and around the duct as you remove the covers. Use a soft bristled brush to clean the inside walls of the vent after you remove the cover by brushing each wall using downward strokes to remove dust and debris. Dampen a soft cloth and wipe down each wall to make sure that it is clean and free of dust and dirt. Unless the ceiling around the vent is extremely dirty, a soft, damp cloth will usually suffice to wipe away any dirt that has settled on the ceiling around the vent.
7. Clean and replace the vent covers. After you have removed all of the vents and cleaned each duct, use a soft brush to scrub the vent covers in the bucket of water. Be care not to damage the finish of the vent cover – – for example, if the covers are painted you should use a rag instead of a brush. Dry each cover thoroughly, reinstall them checking the screws to make sure that they are still in good shape, and do not need to be replaced.