This article will teach you how to make cooked salt and flour clay. Cooked salt and flour clay is an excellent craft clay for kids to make and use. Kids will need adult supervision to make the clay, but they sure won’t need any help coming up with creative ways to use this clay.
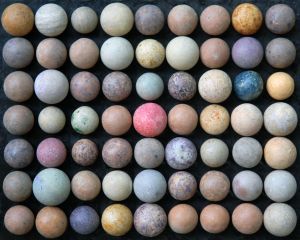
This clay is especially good for making rustic clay marbles or clay beads (make the hole in the bead before the clay dries). You can also use this clay with clay molds. This clay will air dry to a hardened state. You do not bake it. You can color the clay with food coloring as you make it or you can paint the clay projects after they are dry. This recipe will make about 3 cups of cooked salt and flour clay. If you need more than 3 cups for your projects it is best to make several separate batches instead of one huge batch.
Step 1: Gather the following ingredients to make cooked salt and flour clay: 1 plus 1/2 cups of salt, 1 plus 1/2 cups of flour (not self rising), 4 teaspoons of powdered alum (look for it with the spices), 1 plus 1/2 cups of water, 1/4 cup vegetable oil, food coloring.
Step 2: Mix the salt, 1 cup of the flour and the alum in a saucepan. Add the water slowly and stir to break up any lumps.
Step 3: Place the saucepan over low heat and cook, stirring constantly, until the mixture is rubbery and difficult to stir.
Step 4: Add the vegetable oil to the clay and stir until well blended.
Step 5: Turn the clay out onto a plate or foil and let it set until it is cool enough to handle.
Step 6: After the clay has cooled, feel it. If it is sticky, add a bit of the remaining flour and mix with your hands. Add just enough so it is no longer sticky.
Step 7: Divide the clay if you want more than one color and add a few drops of food coloring to each portion. Knead the food coloring in with your hands (you may want to wear plastic gloves or put your hands in baggies for this step). You can also leave the clay its natural color and paint your projects when they are dry.
Step 8: Make your beads, marbles, decorative plates, molds, jewelry, wall hangings, figures or whatever your feel like creating. Just make sure your project is not too thick because it must air dry.
Step 9: Let your project air dry for one or two days. When it is dry it will be completely hard. Do not bake this clay.
Step 10: You may store any leftover clay in an airtight container. If it dries you will need to throw it out. It will keep for a short time without drying. Do not refrigerate.
If you liked this recipe for cooked salt and flour clay you must try some of my other homemade craft recipes!
How to Make Easy Play Clay
How to Make Quick and Easy Modeling Dough
How to Prepare Natural Clay for Pottery
How to Make Decoupage Glue
How to Make Collage Glue
2 Glue Recipes: Stamp Glue and Envelope Mucilage