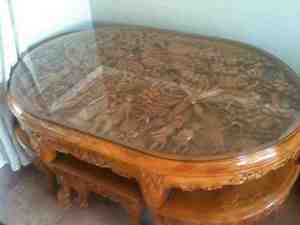
When you carve a low relief wood carving you don’t have to worry about a frame, as the wood frames your picture or design. Here are some tips for carving in low relief.
Relief carving is carving pictures in wood. Instead of standing on their own, figures are only slightly raised from the background. While low relief carving is usually carving no more than ½” from the wood, there are other types of relief carving. For example, medium relief, also known as bass relief, is typically ½” to 2″ deep. Deep relief is even higher, with about 2″ of depth or more. When there are no cast shadows from one object to the next, the relief is usually a deep carving.
The Process of Low Relief Carving
Relief carvers chip away wood from a flat wood panel so that an object seems to rise out above the wood. Beginning with a design idea, they either draw directly on the wood or transfer their drawing drawn on paper, using carbon paper onto the surface of a piece of wood. Then, using carving tools they remove the background wood.
Carving Tools and Woods
Carving tools range from inexpensive ones fewer than $5 for a set of six tools to pricier ones as much as $100 more. Gouges are identified by a cutting edge width in inches or millimeters. The sweep is the degree of curvature of the edge and the shape of the shaft is either straight, bent, back bent or spoon-shaped. Gouges come in widths from 1 1/16″ to 2 3/8″. Sweeps range from a number 2, which is a slightly noticeable curve to a size 11, which is a very deep half round curve. A straight gouge is usually used as a “stopper” to set the boundaries of an object from its background.
Basswood, aspen and butternut are best for beginners and can be found at craft and carving supply stores. Don’t use old lumber found in your garage as you’ll probably get discouraged.
Finding a Pattern
There are several options for finding a design or pattern. If you have exceptional drawing skills you could always lightly pencil in your drawing directly onto the wood surface. However, even accomplished artists usually make their drawings first on scrap paper and then transfer them to the wood using carbon paper.Web sites such as Classic Carving Patterns offer scores of patterns on a wide range of designs. You can also find patterns from woodcarving books and publications.
Removing Background
After your design has been drawn or transferred to the wood, the next step is outlining the design with a carving tool. Next using assorted carving tools such as c-curved gouges or skews, “hog out” your excess wood. After setting in the background, start smoothing out the background area by using shallower gouge cuts. At this stage the background doesn’t need to be totally clean.
Modeling Each Item
Using a straight gouger, again, define area intersections and shave or round off areas where you’ll be working so as to start producing a dimensional look. Usually, you’ll start at the high point of the center of an area. Then narrow down in all directions to the neighboring parts of the design.
Although low relief is the shallowest type of relief carving, you should still establish levels. For example, a bird’s feathers is typically higher than the body of the bird. Include fine detail, using the v-gouge or a veiner.
When you’ve finished carving, decide on a finish. While some carvers use acrylic paints, others believe paint detracts from the beauty of a relief carving. However, staining or a clear finish is usually always applied, as well as sealer.
Most of all have fun and practice. Be patient with yourself, carving to relax and express your creativity rather than expecting to be an over-night master carver.
Originally published on Suite 101.