A few years ago I undertook the massive task of converting my vinyl collection, which is over 10,000 pieces strong, over to MP3 format. The process took over a year but in that time I learned some good tricks to maintain quality while converting an LP to digital media.
Step 1 (The Source)
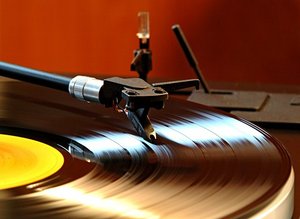
The most important part of this process is the original audio source. Make sure you invest in a good LP brush and find the best turntable and stylus that you can. It’s impossible for the final product to be better than the original source, so make sure your record is clean and there are no warps that would affect the sound quality.
Step 2 (The Connection)
For this process you don’t have to worry about a stereo receiver, the turntable connects directly to the back of the computer through a “Y-adapter.” One end of the cable connects to a turntable via RCA plugs and the other end connects to your computer with a 3.5mm male plug. Most turntables have a ground wire. Make sure the turntable is grounded to something otherwise it will produce an annoying buzz that will ruin your recording.
Y-adapters are available at just about any electronics store or local superstore. Be sure to buy a quality cable. The cable is the lifeline from your turntable to the computer and is a crucial component of the end result. I prefer an adapter cable that has gold connections and good insulation. It shouldn’t cost more than $15 for a good cable.
The computer plays an important role in sound quality as well. You should avoid desktop computers with noisy fans or other components. A highly sensitive turntable will pick up residual sounds like a computer’s fan noise. The best bet is use a quiet laptop and place the turntable several feet away from the computer.
Step 3 (Software)
There is tons of sound editing and recording software on the market. This project doesn’t require anything too fancy but keep in mind some editing is required. Audacity is a good free program for Windows. If you have a Mac, Garageband works well for this process.
Be sure to select a program that displays a sound wave. After you record each LP you will have to use the dips and breaks in the sound wave to find the beginnings and ends of the songs.
If you plan to convert a large vinyl collection is good idea to invest in a better sound program such as Adobe Audition and also upgrade your computer’s soundcard.
Step 4 (Software Settings)
Make sure your sound recorder is set to record from the correct input, usually “line-in” or “mic.” Create a new basic track in your sound recorder and make sure any optional sound effects that the program may offer is turned off.
The goal is to import the original sound of the LP. Many sound programs offer effects that claim to improve the sound quality of analog recordings. These “improvements” usually dull the sound of the original recording. If you want to try these effects, create and save a clean master copy first and edit a copy of the original file.
Step 5 (Test Recording)
With your turntable is connected to your computer and your recording software installed it’s time for a test run.
Start your sound recorder and drop the needle on the turntable. If you use Garageband make sure the metronome is turned off. You should be able to hear the song through your computer’s speakers and see the song on your monitor in the form of a sound wave.
When side A of the record is over don’t stop the sound recorder. Flip the record to side B and continue the recording. This way the songs will be in order and both sides of the LP will be on the same sound file.
Step 6 (Save the File)
There are several different file formats and bit rates you can save the file at. For your original master copy it is best to save it in the native file format used by your recording software. For example, Audacity uses an AUP native file format and Garageband uses an AIFF native format.
Your master file should contain one continuous sound wave. Look for the dips in the sound wave to indicate where songs begin and end. Select the portion of sound wave that indicates the first song. Select “save as” in your program and name the file the title of the first song on the LP.
At this point you will also be able to choose the bit rate of the MP3 you are about to create. The highest bit rate available on most programs is 320 kb/s. An MP3 is a compressed file and this bit rate offers the least compression, which means the sound quality will be closest to the original source. The higher the bit rate is, the larger the file will be. If you have concerns about limited space on your hard drive, a 192 kb/s bit rate may be more acceptable.
Step 7 (Listen to the Test Recording)
Play the track on the best sound system you have available. For most people this would be either in their living room or car. Don’t think those cheap computer speakers will replace a quality sound system.
Listen for any buzz or hum that was not on the original track. Disregard skips and pops that were present on the original LP, the sound recording program can’t eliminate those. Also listen to the volume level and make sure it is consistent with other media you play on the same sound system. If the volume level is off open the mp3 file in your sound recorder and adjust it from there.