Fall is the time to plant new iris rhizomes, or to divide and transplant irises in an overcrowded bed. Irises in established beds continue to multiply year after year. Every three or four years you should make divisions to thin out your iris bed so the plants will continue to grow and bloom vigorously. Overcrowding creates the perfect environment for rot and fungus to set in, and crowding forces the plants to compete for nutrients and water. The health of the plants and the quality of the flowers suffer from crowded conditions.
Prepare a planting bed by tilling the soil at least eight inches deep. Mix in humus/compost as needed. Use your hands or a rake/shovel to make two parallel trenches with a raised ridge between them. Move some of the loose soil towards the outer edges of the trenches, and use some of the tilled soil for the ridge. You’ll plant the rhizomes on top of the ridge and pull the loose soil from the edges to cover the roots.
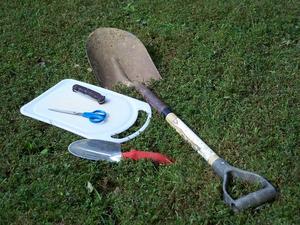
You Will Need:
Shovel or spading fork
Small trowel, optional
Sharp knife
All-purpose scissors
Cutting board, optional
Examine your iris bed and locate crowded areas that need thinning. Most irises should be planted 15″ to 18″ apart. To thin an established iris bed, remove sections of rhizomes, leaving the established plants every 15″ to 18″. The thinned rhizome sections can be trimmed and transplanted into a new bed.
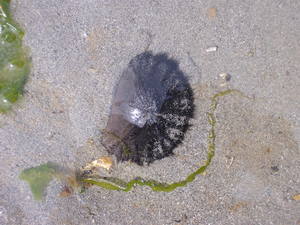
Carefully dig around the rhizomes, digging deeply and lifting gently. The rhizomes have long, spidery roots, usually 8″ or more in length. (See photos above, or complete slideshow here.) Keep as many roots intact as possible. A spading fork does a good job of lifting and separating the iris plants from the surrounding soil without breaking the roots. A shovel works equally well, as long as you’re careful with the roots.
Brush the soil away from the roots and examine the rhizomes. A healthy iris rhizome should feel like a potato when you gently squeeze it. Look for soft spots, loose skin or small holes in the rhizome. These areas may have rot or fungal disease, or they may be harboring insect pests. Dispose of damaged rhizomes in the trash or by burning to keep from spreading the disease. Do not compost them.
Some rhizomes will have several new baby plants growing along their length. Each plant that has roots growing beneath the leaves can be cut apart to become an independent iris. Use a sharp knife and cutting board to make clean cuts when you separate the rhizome into baby plants.
Use clean scissors to trim the long leaves of older plants into a fan shape, down to about 5″ to 6″. Baby plants with new leaves do not need to be trimmed.
Place the iris sections on the prepared soil ridge. Spread the roots on either side of the ridge so they “grow” down into the trench on either side. Scoop loose soil into the trench and up over the roots so that the rhizome on the ridge is buried about halfway.
Pack the soil firmly around the roots. Water the new plants, making sure that the soil does not wash away.
Mulch with leaves, straw, or organic material that will not compact heavily. Add more mulch before the first freeze is predicted. The transplanted root systems will develop during the fall until cold temperatures cause dormancy. You won’t see top much growth until next spring.
Read more by this author here.
Complete iris slideshow here.
Source:
Personal Experience